Using PhotoShop Plugin: FixerLabs, FocusFixer


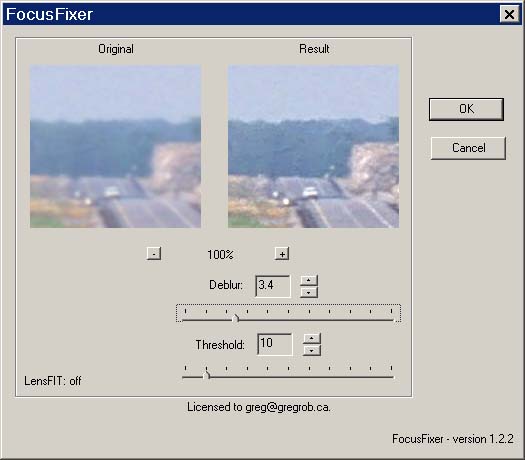
Here is a simple example of using FixerLabs FocusFixer which is an inexpensive plugin for Adobe Photoshop. I recently came across this program while looking at some other software for improving the focus of scanned photographs. However the other software was part of a larger package of mathematical programs which cost $799. Which was much more than I was willing to pay.

My understanding is that the package uses a concept called deconvolution in which fourier transforms are used to reverse the blur introduced by an out of focus lens.

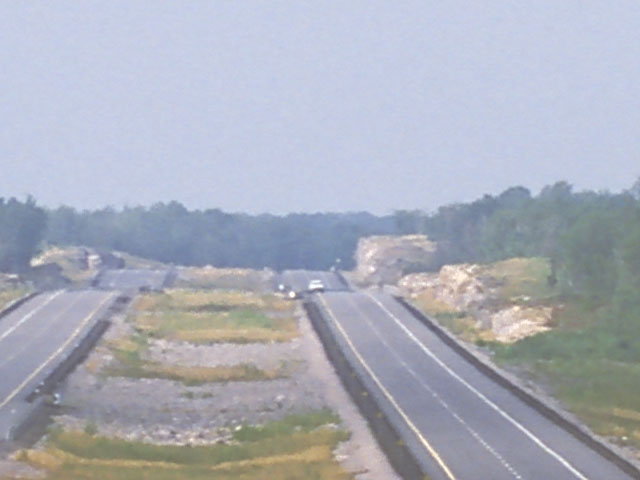
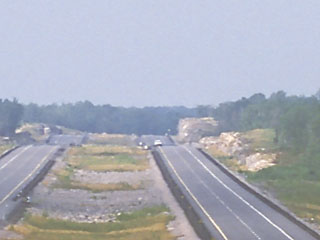
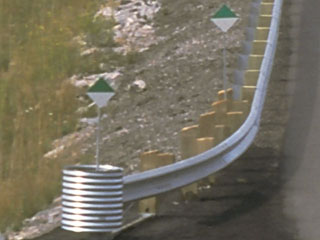
This first picture is what we are starting with. In this detail from a scanned 4x5 large format transparency, a maintenance truck in the distance is the only traffic on this new highway which was still under construction. The picture is a little blurry.
Before We start


If you have installed it correctly you will find the FocusFixer plugin under the FixerLab Filters item under the Photoshop Filter menu item. A window similar to the following will open when you select FocusFixer.
First Step using FocusFixer

Make sure the threshold is set to 0 and work with the Deblur setting until you have reached maximum sharpness. I start at 2 and then try stepping up and down from there by whole integer values. Once things are close I work with the decimal place.
second Step using FocusFixer

Now you can slowly turn up the threshold value until things like the sky are smooth and any other things you consider artifacts are gone. There is a lot of individual preference to choosing the most appropriate threshold value.
second Step using FocusFixer

Once you click OK the computer will take some time to apply the filter. On my Pentium 4 1.8Ghz machine it takes about 15 seconds to apply the filter to a 1024x768 image. Using the filter on a scanned 4x5 image, which was 11,000x8,500 pixel took a very long time. I think it was over 20 minutes. FixerLabs doesn't actually suggest using the filter on an entire image. You should read their documentation for more details. After the filter has run we get the following result, which is a vast improvement over the original.
after FocusFixer

For comparison purposes here is the picture if we used Photoshop Unsharp Mask instead of FocusFixer. It is pretty good, but not as good as the image above.
after unsharp mask

We can actually apply Unsharp mask after using Focus Fixer, and this will give us some improved local contrast in the picture. This extra step should not always be made as it would often be overkill. After applying both the FocusFixer and the Unsharp Mask we end up with the following result.
After we are done


And here are comparisons of before and after FocusFixer in a few portions of the orignal photograph.
trunk before
trunk after focusfixer
Before
Truck detail
Back of photo
After

guardrail before
guardrail after focusfixer
Before
Guardrail detail
Middle of photo
After

highway lane marker before
highway lane marker after focus fixer
Before
Highway lines detail
Foreground of photo
After

BACK


Greg R's Home Page
©Greg Roberts 2002